Already Registered Worker Onboarding Process – Assam Nirman Sakhi BOCW
Construction workers who are already registered with the Assam Building and Other Construction Workers Welfare Board (ABOCWWB) must complete the Onboarding Registration to continue availing welfare benefits. Below is a step-by-step guide for successful registration.
Registration Eligibility Criteria for Already Registered Worker
If you’re already registered as a beneficiary with the Assam Building and Other Construction Workers Welfare Board (ABOCWWB) and are looking to complete your onboarding registration, here’s everything you need to know about the eligibility and required documents.
Who is Eligible?
To be eligible for onboarding registration, you must already be a registered beneficiary with the ABOCWWB.
Documents Required for Onboarding Registration
Make sure to have the following documents ready during the registration process:
- Existing Assam BOCW ID Card
- This proves your prior registration with the board.
- Subscription Fee Payment Receipt
- Evidence that your membership contributions are up to date.
- Proof of Present Address
- Required if your current address is different from the one mentioned in your Aadhaar card. Acceptable documents include:
- Driving License
- Voter ID Card
- Ration Card
- Bank Passbook or Working Record Book
- Required if your current address is different from the one mentioned in your Aadhaar card. Acceptable documents include:
- Aadhaar-Linked Bank Passbook
- Ensures your bank details are correctly linked for any welfare scheme benefits.
- E-Shram Card
- You’ll need the ID number for the form. (Note: Uploading the E-Shram Card is not necessary—just enter the correct number.)
- Aadhaar Card
- Similarly, you only need to enter the Aadhaar number in the form. No upload is required.

Already Registered Worker Registration Step by Step
If you’re a construction worker looking to register under the official Nirman Sakhi portal, you’re just a few steps away from getting started. This simple guide will walk you through the entire onboarding process, from visiting the website to verifying your Aadhaar details. Let’s get you registered!
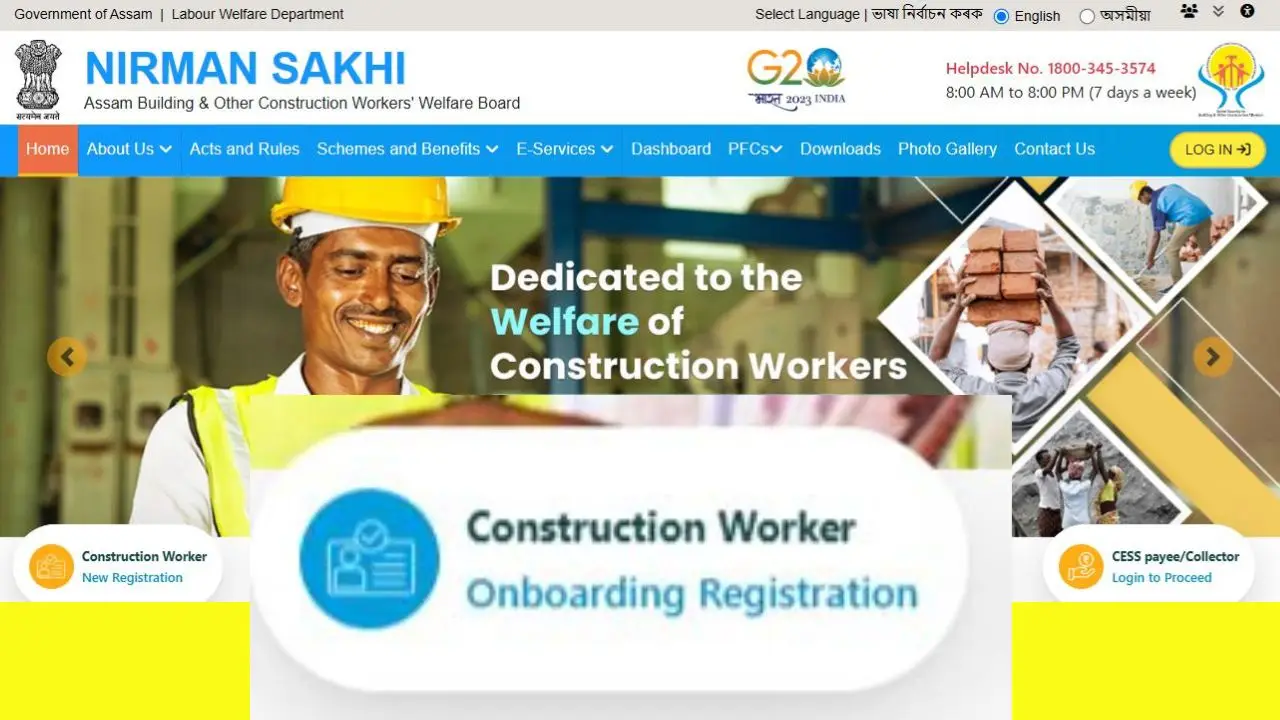
Step 1: Start Your Onboarding Registration
Head over to the portal’s home page and click on the “Onboarding Registration” option under the “Construction Worker” section. This is where your journey begins.
Step 2: Enter Your Mobile Number
You’ll be asked to enter your phone number. A single mobile number can be used for up to four registrations.
Step 3: Choose “New Onboarding”
If this is your first time registering, simply click on the “New Onboarding” option.
Step 4: Fill in the Mandatory Fields
A form (or modal) will appear. Complete all the required details carefully:
- District: Choose from the dropdown list. (Required)
- Office: Select your appropriate office from the available options. (Required)
- Contact Number: This will be auto-filled based on your earlier input.
- Aadhaar Consent: Tick the checkbox to give consent. A confirmation message will pop up — click on “I Agree” to proceed.
You’ll now be asked to provide either your Aadhaar number or VID (Virtual ID).
- Enter the number you prefer.
- Click the “Generate OTP” button.
- Tick the checkbox to give OTP consent.
- You’ll receive a one-time password (OTP) on your registered mobile.
- Enter the OTP and click “Submit OTP”.
Step 6: Complete Your Registration
Once your Aadhaar eKYC is successful, click on “Register Now” to finish the process.

Step 7: Fetch Already Registered Worker Details
If you’ve previously registered as a construction worker and want to verify or update your details, here’s how you can do it easily through the online portal.
a. Enter Your Valid ID Card Number
To begin, simply enter your valid ID card number and click on the “Fetch Worker Data” button. The system will retrieve your existing records from the database.
b. Data Extracted from ID Number
Once submitted, your details — including:
- Name
- Care Of (Guardian/Father’s Name)
- Gender
- Date of Birth
will be automatically pulled from the ID card you’ve entered.
c. Data Extracted from Aadhaar
If you’re using your Aadhaar number, the same information (Name, Care Of, Gender, and Date of Birth) will be extracted directly from your Aadhaar database.
d. mismatches between your Aadhaar data
In some cases, the system may find mismatches between your Aadhaar data and the old worker database. When this happens, you’ll see an alert message.
Here’s what you should do:
- ✅ Click “Yes”: If you’re okay proceeding with the Aadhaar information, your registration will move forward.
- ❌ Click “No”: If the data seems incorrect, you’ll need to update your Aadhaar information first before continuing.

Step 8: Basic Details Form
Once you’ve initiated your registration and verified your Aadhaar, the next step is to complete the Basic Details Form. This is a crucial section that collects your personal, professional, and ID-related information. Don’t worry—it’s mostly auto-filled and quite straightforward.
Let’s go through it step by step
All mandatory fields are marked with an asterisk (*). Fill these in carefully to avoid any rejections.
a. Name
There are three fields for your name:
- Pre-filled from Aadhaar (Primary Source) – Required
- Pre-filled from your existing BOCW card
Aadhaar data is considered the most reliable and will be used as the final reference.
b. Care Of (Guardian/Father’s Name)
- Pre-filled from Aadhaar (Required)
- Pre-filled from BOCW card
Again, Aadhaar will take priority in case of a mismatch.
c. Gender
- Pulled from both Aadhaar and BOCW card
- Aadhaar is the final authority (Required)
d. Date of Birth
- Comes from both Aadhaar and your BOCW card (Required)
- Aadhaar-based DOB will be considered official
e. Age
- Auto-calculated from your Date of Birth
- Based on Aadhaar (primary) and BOCW card
f. Marital Status
Select your current marital status from the available dropdown. (Required)
g. Category
Choose your social category (e.g., General, SC, ST, OBC). (Required)
h. Contact Number
Pre-filled from Aadhaar. (Required)
i. e-Shram Number (UAN)
Enter your valid 12-digit UAN. (Required)
Make sure it’s accurate — no spaces or hyphens.
j. Education Details
Select your highest educational qualification. (Required)
k. Blood Group
Choose your blood group from the list. (Required)
l. Subscription Fees Paid Till Date
Enter the total amount you’ve paid in subscription fees so far. (Required)
m. Card Issue Date
Mention the issue date of your existing BOCW ID card. (Required)
n. Card Validity Date
Fill in the validity date from your current card. (Required)
o. Subscription Payment Date
Enter the date when the last subscription payment was made. (Required)
p. Amount Paid
Mention how much was paid during the last subscription. (Required)
q. Date of Retirement
This will be auto-filled based on your age.
r. Profession
Choose your current occupation (e.g., mason, carpenter, painter). (Required)
s. Do You Have a PAN Number?
- If Yes, enter your PAN number (Required)
- If No, you can move ahead
t. PF Number (Optional)
Provide your Provident Fund number, if available.
u. ESIC Number (Optional)
Enter your ESIC number, if applicable.
v. Registered with Other State BOCW Board?
- If Yes:
- Select the state
- Enter your BOCW Membership ID (Both Required)
w. Do You Have a Ration Card?
- If No, move to the next section.
- If Yes:
- Enter your Ration Card Number (Required)
- Select the Ration Card Type (Required)
- If No, proceed.
Final Step: Save Your Details
Once all the required fields are filled, click on the “Save Basic Details” button to move forward in the registration process.

Step 9: Worker Address Section
After completing your basic details, the next step in the registration process is to fill in your address information. This includes both Permanent Address and Present Address, with many fields conveniently auto-filled from your Aadhaar.
1. Permanent Address:-
This section is auto-filled based on the details available in your Aadhaar card. All fields marked with an asterisk (*) are mandatory.
Here’s what will be automatically filled:
- State (Required)
- District (Required)
- Subdistrict (Required)
- Post Office (Required)
- Village/Area (Required)
- Locality (Required)
- Landmark (Required)
- Pin Code

Present Address:-
This section confirms where you’re currently living. You’ll have two options:
If your Present Address is the same as your Permanent Address
Just click the checkbox to copy the data.
Then fill in the following additional fields:
- Type of Residence (e.g., owned/rented/others) (Required)
- Type of House (e.g., pucca/kutcha/semi-pucca) (Required)
- House No. (Required)
- Locality (Auto-filled)
- Village/Area (Auto-filled)
- Landmark (Auto-filled and Required)
- Post Office (Auto-filled)
- Subdistrict (Auto-filled and Required)
- District (Select from dropdown)
- State (Auto-filled)
- Pin Code (Auto-filled)
Save Residential Details – Click this to save your address and move on to the next step in the registration
Step 10: Bank Details Form
a. IFSC Code (Required)
Start by entering the IFSC Code of your bank branch.
Then click on the “Search Bank Details” button.
b. Bank Name (Auto-filled, Required)
This will be automatically filled after the IFSC code is verified.
c. Branch (Auto-filled, Required)
The specific branch name linked to your IFSC code will appear here.
d. Bank Address (Auto-filled, Required)
The full address of the bank branch will also be auto-filled.
e. Account Number (Required)
Enter your bank account number where you wish to receive payments. Double-check for any typos!
f. Confirm Account Number (Required)
Re-enter the same account number for confirmation.
Both entries must match exactly to avoid errors.
Save Bank Details – Click this button to save your banking info and proceed to the next section

Step 11: Family / Nominee Details

A. First Name (Required):-
Enter the first name of your family member or nominee.
B. Last Name (Required):-
Enter the last name or surname.
C. Date of Birth (DOB) (Required):-
Fill in the date in DD-MM-YYYY format. This helps in automatic age calculation.
D. Age:-
This field is automatically calculated based on the date of birth you entered above. No manual input needed.
E. Select Nominee (Required):-
Choose Yes if this person will be your nominee for receiving benefits in case of your death or disability.
If you choose No, the form will prevent you from proceeding — at least one nominee is required.
F. Guardian Name:-
If the nominee is a minor (under 18 years of age), enter the guardian’s full name.
This ensures that benefits can still be accessed legally on their behalf.
G. Nominee Share
If you selected Yes for nominee:
- Enter the percentage share of benefits this nominee should receive.
- If you’re entering just one nominee, it must be 100%.
- If there are multiple nominees, their combined share must add up to 100%.
H. Relation with Applicant (Required)
Select the nominee’s relationship to you—options may include spouse, child, parent, sibling, etc.
Add New Row:
- If you want to add another family member, please click this button.
- Previous: Click to go to the previous page.
- Save Family: Click to save this page and proceed to the next page.
Step 12: Scheme Details – Declare Your Enrollment in Government Schemes
As part of the registration process, it’s important to share whether you’re already benefiting from any government flagship welfare schemes. This information helps authorities coordinate benefits and avoid duplication of services.
Here’s how to fill out the Scheme Details section:
Have you been enrolled in any flagship schemes? (Required)
Choose “Yes” or “No” from the dropdown list.
If you select “Yes”:
You will be asked to mention the names of the schemes in which you are currently enrolled.
Examples might include:
- PMAY (Pradhan Mantri Awas Yojana)
- Ayushman Bharat
- Ujjwala Yojana
- National Pension Scheme (NPS)
- E-Shram
- Any state-level construction worker welfare schemes
If you select “No”:
You can simply proceed by clicking the “Save Other Schemes” button to go to the next section.
Step 13: Supporting Documents – Final Step to Complete Your Worker Registration

Before you can submit your application for the Construction Worker Welfare Scheme, you need to upload your supporting documents. This section helps verify your eligibility and confirms the information you’ve entered so far.
Let’s break it down step-by-step
Important Note:
- All uploads must be in PDF format
- Each file must be under 500 KB
- You can view uploaded files using the “red-eye” preview button
Required Document Types:
A. Existing BOCW ID Card
- Click “Choose File” to select your file
- Then click Upload
- Use the red-eye icon to preview
- Status will change from Pending ➜ Uploaded
B. Subscription Payment Receipt
- Follow the same steps: Choose File ➜ Upload ➜ View
- Must be a PDF copy of your latest payment receipt
C. Bank Passbook Copy
- Upload a PDF copy of your passbook showing your name and account number
- Again, follow the standard steps
D. Ration Card
- Upload a PDF copy of your ration card
- Use the red-eye icon to preview
E. PAN Card
- Upload a PDF of your PAN card
- Use the preview option to confirm the upload
F. Passport Photo
- This will be auto-filled from your Aadhaar — no need to upload manually.
Step 14: Preview Application – Review Before Final Submission

Before you officially submit your registration, you’ll get a complete preview of your application. This is your last opportunity to verify everything – from your personal details to uploaded documents.
Here’s what to expect:
What You’ll See:
- A complete summary of your application details – name, Aadhaar info, contact number, scheme enrollment, nominee, address, and bank details.
- A document preview section, showing all the files you’ve uploaded.
Edit for Correction:-
Found a mistake? No worries! Click this to go back and edit any incorrect details or upload missing files.
Download PDF:-
Click this button to download a full copy of your application for your records. It’s good practice to keep this for future reference or verification.
Final Submit:-
- Double-check everything.
- Confirm your documents.
- Tick all required checkboxes.
Once you’re 100% sure:
- Click Final Submit
- A dialog box will appear asking for confirmation
- Click “Yes” to complete your submission
Step 15: Acknowledgement Page – Your Registration Is Now Complete
Once you successfully submit your application, you’ll be directed to the Acknowledgement Page — a confirmation that your registration has been received and is now pending approval by the Registering Officer.
Here’s what happens next and how to save your submission proof
This page confirms that your registration was completed successfully. It shows your application reference number and status.
a) Download Receipt
Click this button to download your registration receipt.
This is your proof of submission — save or print it for your records.
b. Download Payment Receipt
If you’ve made a payment during the process (e.g., subscription fees), click here to download your payment receipt.
c) Return to Homepage
Done for now? Use this button to go back to the homepage and start another application or check for updates later.

What Happens After This?
- Your application will now be reviewed by the Registering Officer
- If there are any issues or additional verifications needed, you may be contacted
- Once approved, you’ll receive further updates regarding your eligibility and benefits
Keep both your Registration Receipt and Payment Receipt in a safe place — they’re essential for tracking your application and accessing welfare services later on.
Also read:-